When we install magento then we have to add some basic configuration in the admin. In this tutorial we get some knowledge about basic configuration i.e. how to set default country where your business located, how to allow country which you accept order etc.
For this basic configuration you can follow the below instructions:
* Go to Store -> Configuration -> General -> General
A.) Country Options
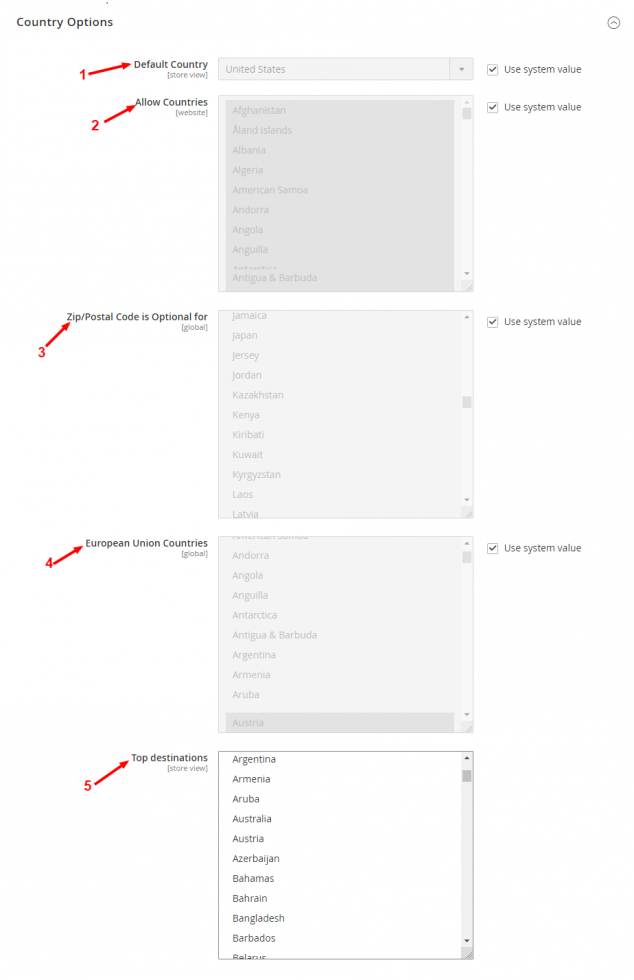
1.) Default Country: Select Default Country where your business is located.
2.) Allow Countries: Select each country from which you accept orders. By default, all countries in the list are selected. To select multiple countries, hold down the Ctrl (PC) or Command (Mac) key.
3.) Zip/Postal Code is Optional for: select each country where you conduct business that does not require a ZIP or postal code to be included as part of the street address. It is optional.
4.) European Union Countries: select each country in the EU where you conduct business. By default, all EU countries are selected.
5.) Top destinations: select the primary countries that you target for sales.
B.) State Options

6.) State is Required for: select each country where Region/State is a required entry.
7.) Allow to Choose State if It is Optional for Country: Set the Allow to Choose State if it is Optional for Country field to one of the following:
- Yes In countries where the state field is not required, includes the State field as an optional entry.
- No In countries where the state field is not required, omits the State field.
C.) Locale Options
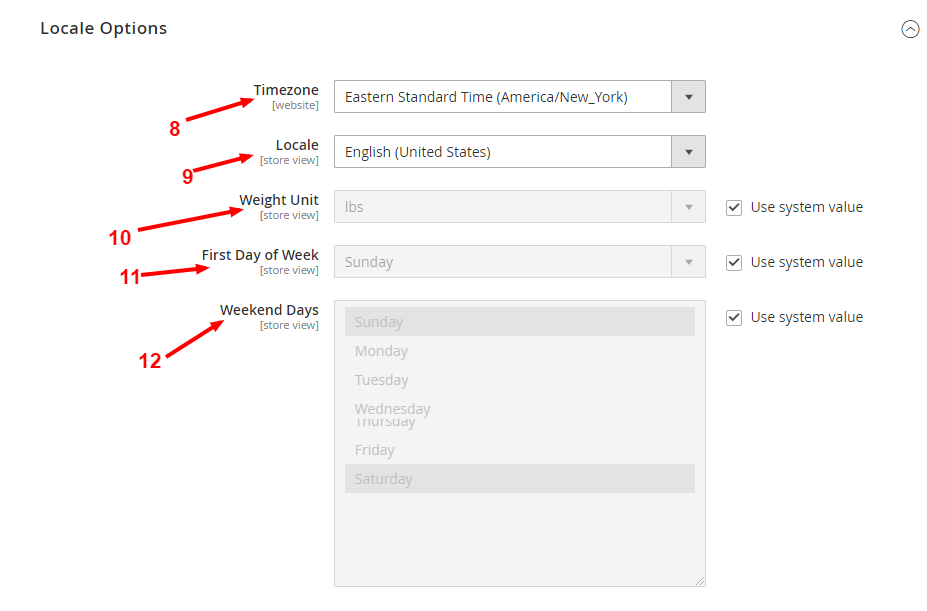
8.) Timezone: Select your time zone from the list.
9.) Locale: Select your store language.
10.) Weight Unit: Choose your weight unit. It’s for shipment.
11.) First Day of Week: Select first date of week.
12.) Weekend Days: Choose the days which fall on a weekend days.
D.) Store Information
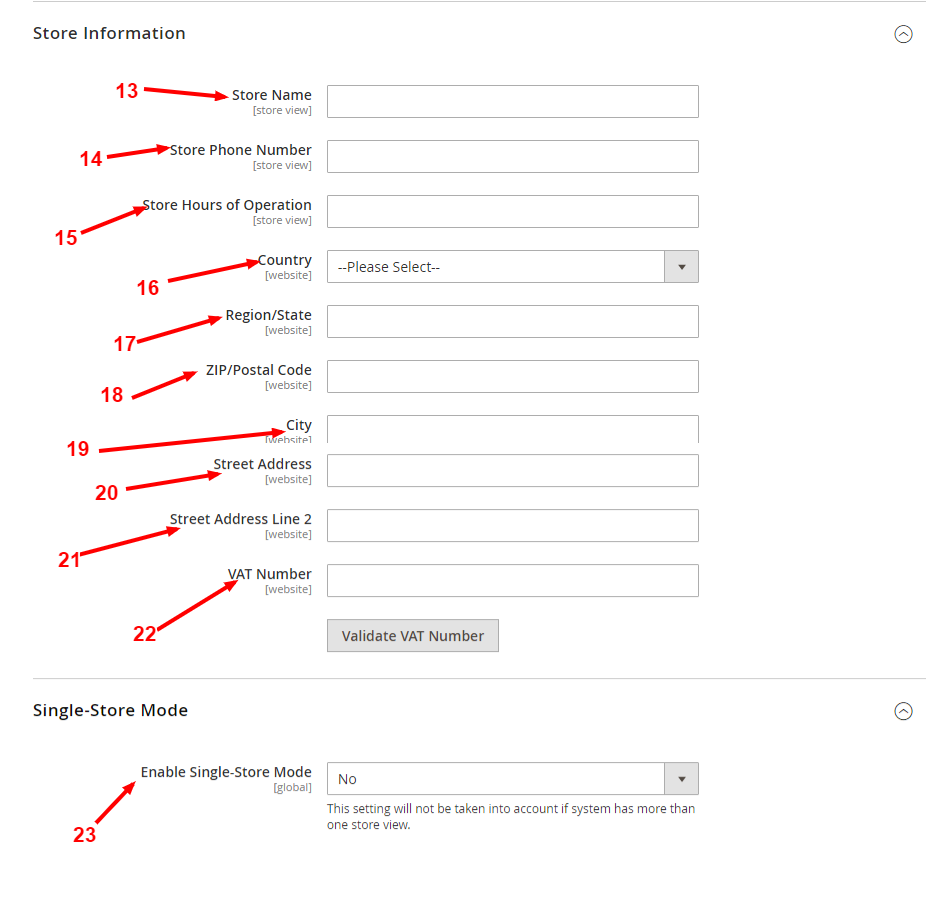
13.) Store Name: Enter the Store Name that you want to use in all communications.
14.) Store Phone Number: The store’s phone number helps the store visitors contact you easily. You just have to enter your Store Phone Number (formatting is not necessary). You can enter multiple phone numbers for your store.
15.) Store Hours of Operation: Enter the hours your store is open for business. For example: Mon – Fri, 9-5, Sat 9-noon IST
16 to 21.) Store addresses: Choose your Country from the list as well as enter Region/State, Zip/Postal Code, City, and Street Address. If address is long enter it in second line.
22.) VAT Number: If applicable, enter the VAT Number of your store. To verify the number, click the Validate VAT Number button.
E.) Single-Store Mode
23.) Enable Single-Store Mode: You can enable the Single-Store Mode, in case you have one Website with one Store and Store View and you do not plan to use multiple stores in your Magento installation.
After the above configuration click Save Config and flush cache from admin or by running below command in command-line
php bin/magento cache:flush or php bin/magento c:f
Please contact us at manish@bay20.com or call us at +91-8800519180 for any support related to Magento 2. You can also visit the Magento2 development page to check the services we offer.