Adding content pages and blogs in bigcommerce is a vital tool to increase traffic to your store and provide information to your audience about your products, industry trends, and related topics.
By providing valuable information, tutorials, guides, and how-to articles by adding content pages like contact-us page, privacy policy, disclaimer, about us, and shipping & returns as well as blogs in big commerce stores, web stores can position themselves as a trusted source of knowledge and expertise. By doing so, customers can find the web store’s products more valuable and can make informed purchases.
To Add Content Pages And Blogs In Bigcommerce, Follow the information mentioned below:
Add Content pages in Bigcommerce
You can create content pages in bigcommerce in different forms of pages types
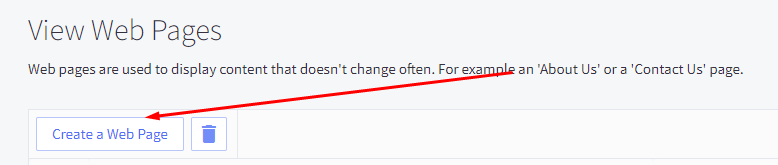
First, log in to your store, and then, go to Storefront>Web Pages and then, Click on Create a web page button located at the top to create a new content page also you can edit the existing content pages by clicking on the three dots at the action side.

You’ll see a bunch of pages type and there is a purpose behind every page type.

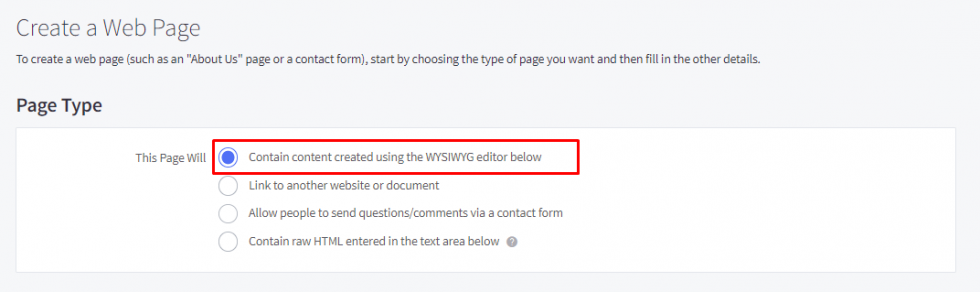
Page types to create a content page in bigcommerce
- Contain content created using the WYSIWYG editor below: Here, you will find a WYSIWYG editor to enter the content of your page. Depending on the theme, the page may appear differently on the storefront.
- Link to another website or document: In this page type you’ll get a name field for the naming of the page and also a field to enter the URL of the site. And the name will display in your store’s navigation.
- Allow people to send questions/comments via a contact form: It will display a WYSIWYG editor and also a bunch of fields that you choose to display on the contact form.
- Contain raw HTML entered in the text area below: It will display an area to insert raw HTML without the theme styling. that means its output will not include things like the store header and footer unless you code them in.
1. For Creating a Web Page with the WYSIWYG Editor
The WYSIWYG Editor will help you to build web pages that automatically generate the required HTML code through the visual editor. This mainly helps to make regular pages like FAQs and About Us.
To create a page with this page type follow these given steps:
Step 1: Select the type Contain content created using the WYSIWYG editor below.
Step 2: Enter a name for the page and that name will show in your navigation menu don’t worry about the page URL it will generate automatically on the basis of the name you have entered also if you want to change the URL you can change it manually.

Step 3: Add the content to the WYSIWYG Editor in the form of pictures or text which you want to show on the page.

Step 4: Finally, you can save your page and also you can add a manual captcha as well as in the navigation menu option you can make your page a child page by choosing any page for parents if you want.

2. Linking to Another Website or Document
This type of page is mainly used for downloadable PDF, Documentation content.
Step 1: For using this page type, Select Link to another website or document.

Step 2: Enter a name for your page as you want it to appear in the navigation and down below insert the URL it will link to. If you are trying to link to an internal file or document, first upload that via WebDAV, then insert the location in the field of the link.

Step 3: Finally, save your page.
3. Allow people to send questions/comments via a contact form
Adding a contact form is an excellent way to get in touch with your customers. you can set up a formatted message so you can control the statement that they send and decrease spam email contacts.
The resident, built-in contact form contains the following fields:

You can not customize these fields to display different labels or add new ones. If you want to customize them instead of doing this try to do it with third-party custom contact.
Follow these steps to make a page Allow people to send questions/comments via a contact form.
Step 1: First, Select Allow people to send questions/comments via a contact form.

Step 2: Enter a name for the page, like we named the page Contact Us.

Step 3: Add the content you’d like to include in the Page Content section. This content will display above the contact form.

Step 4: Add an email address to the Email Question to a text field in which you want to receive messages from the customers the email you’ll add will not show on the storefront. you can also add multiple email addresses by using a comma separator.

Step 5: In Show These Fields, select the options which you want to include on the contact form.

Step 6: Select your preferred Navigation Menu Options and Advanced Options.
Step 7: Finally, save your page.
Third-Party Contact Forms
If you need to add custom functionality or more control over the design of the form, consider using a third-party form builder.
Step 1: Use a custom form builder of your choice to create your form. When finished, save your work and copy the embedded HTML code provided by the third-party form builder. See Additional Resources below for instructions for some of our suggested custom form builders.
Step 2: Select Contain content created using the WYSIWYG editor below.
Step 3: Name the page and then, click on the Edit HTML source button in the section of the WYSIWYG editor toolbar.


4. Entering Raw HTML
It displays a pain text box instead of the WYSIWYG Editor when you select Contain raw HTML entered in the text area below. This page type will render exactly as it is entered in the text field in the form of HTML, it will ignore your storefront template. This option is ideal if you are transferring web page content from another platform.

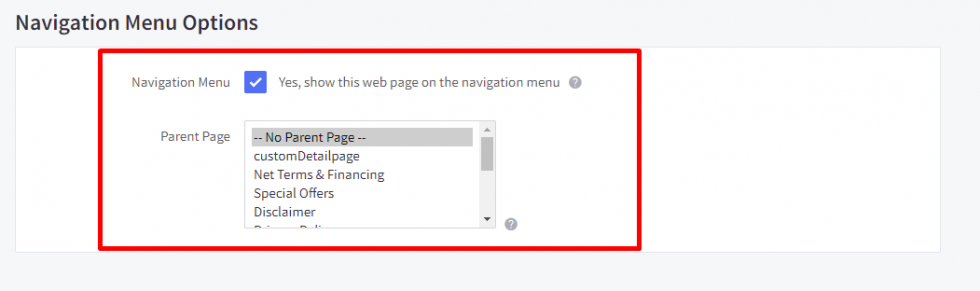
Navigation Menu Options
By selecting Yes, show this web page on the navigation menu you can display web pages on the theme’s navigation. In most themes, this will show the page’s name in the header or side navigation and in the footer. If left unchecked, the page will still be accessible to anyone that has the direct URL, but it will not be visible in the navigation menu. If you want to make your page a subpage then, you can select its parent web page which is located down below in the list Parent Page.

Advanced Options
In every page type, you will see Advance Options like metadata, layout templates, and whether the page is only visible to customers who are signed into their account.

Be sure to follow best practices in length and structure while authoring details, such as the meta description and the page title. There are no metadata options available for the following page types:
- Contain raw HTML entered in the text area below
- Link to another website or document

From the above image, you can understand that Meta tags provide additional information about a webpage to search engines and browsers. The meta description offers a concise summary of the page’s content for search engine results. The page title defines the webpage title, which appears in the browser’s title bar and search engine results. All three elements play critical roles in optimizing a webpage for search engines and providing relevant information to users.
In detail, you can understand more deeply by reading the below information
Page Title: The page title field will specify by this field and then, uses it as an HTML title tag. The page title must contain keywords that people might find on this page when they search. It will use the page’s name as the title if you leave it blank.
Meta Keywords: This field specifies the keywords that will appear in the HTML meta-keywords tag. Enter terms separated by commas. The use of meta keywords as a ranking signal by search engines has been largely deprecated over the past several years. Generally, you don’t need to enter any data for meta keywords.
Meta Description: Adding meta Description plays a silent role in on-page SEO. For writing an effective and maintained meta description, it is very important to understand the intent of the page and also how it bonds to the search query. The meta description is a short summary of a web page provided by HTML so that users and search engines can find it easily. A search engine results page (SERP), it is displayed as part of the search snippet so that the user can get an idea of how the page relates to their search query and the content it contains.
Search Keywords: Search keywords are words or phrases used when conducting an online search. For websites to reach their target audiences and optimize visibility, they are imperative.
Template Layout File: Instead of using the default one you can use your custom layout. You can select the layout from this field if you have created it.
Display As Home Page: By the Checking option you can make your display the home page of your store.
Restrict to Customers Only: By Checking the option, you can make your page accessible to the customer only to those who have logged in to your store.
Sort Order: The order in which this page will be displayed in the navigation menu. A lower number will move it up in the navigation, while a higher number will move it down. Negative numbers may be used.
• Add Blogs In Bigcommerce
Adding blogs in bigcommerce is the best way to promote your products and give your store a personal touch, as well as provide a boost to your site’s SEO ranking.
There are two methods to add blogs in bigcommerce.
- Adding Blog using Built-In Blog
- Linking third-party blogs
Adding Blog using Built-In Blog
Adding a blog using a built-in blog follow these given steps:
Step 1: Firstly, go to Storefront > Blog and click on the + plus icon to create a new blog.

Step 2: Add the post a Title and then, add your blog content to the body of content.

Step 3: You can directly publish your blog by clicking on the Publish button. And also you can add the blog in the draft by clicking on the Save Draft if you are still working on it.

Optional Fields:
Author — designates who wrote this particular blog post
Tags — used for categorizing similar blog posts
Summary thumbnail image — displays a thumbnail image to be included in the blog post and summary

SEO Fields:
Post URL — designates a specific URL for the post; by default, the URL is based on the post’s Title
If the Post URL changes — indicates whether old links should forward to the new URL. Our default is always to forward them.
Meta description — specifies the description that will appear in the appropriate meta tag for this post

Linking third-party blogs
To add third-party blogs in bigcommerce follow these steps:
Step 1: First, go to the Storefront › Web Pages and then, click Create a Web Page.
Step 2: And then, Select a page-type Link to another website or document.

Step 3: Finally, save your page after giving a title for the blog and adding a URL of that third-party blog.

Please contact us at manish@bay20.com or call us at +91-8800519180 for any support related to Bigcommerce. You can also visit the Bigcommerce development page to check the services we offer.