Salesforce DX is a suite of tools that simplify the entire development lifecycle. It enhances the team’s development and facilitates automated testing and continuous integration, making the release cycle more efficient and agile.
Most of the setup of Salesforce DX enables you to use Scratch org. Scratch org is a short-term disposable and configurable environment that you can use while starting a new project or a feature test. The default life span of a scratch org is 7 days while its maximum life span is 30 days. You must enable DevHub in your Salesforce org so you can create and manage scratch orgs.
To Set up Salesforce DX Environment, follow these steps:
1. Enable DevHub in your Salesforce ORG to setup Salesforce DX
Step-1: First, log in to your Salesforce org.
Step-2: Then, In the Quick Find box, Search for “Dev Hub” and then, click “Dev Hub” from the result to open Dev Hub Setting.
Step-3: Then, Click the “Enable Dev Hub” toggle button to enable the dev hub in your org. Remember, once you have enabled the “dev hub”, you can never disable it later.

2. Install the Salesforce Command Line Interface(Salesforce CLI)
Step-1: Download and install the Salesforce CLI for your Operating System.
Step-2: Then, confirm the Salesforce CLI is installed properly and in its latest version by running the following command in the terminal.
sfdx update3. Log in to the Dev Hub
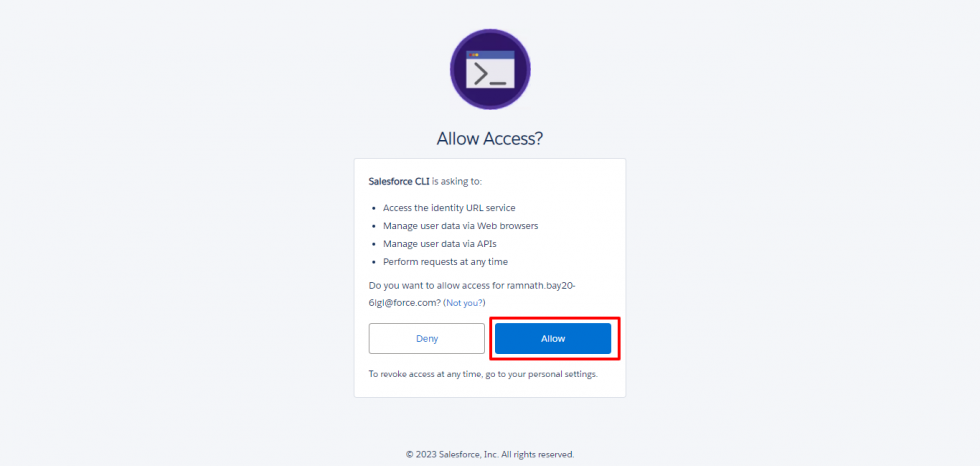
Step-1: To authorize the Dev Hub, enter the following code in the command window. This will open Salesforce login page in your browser:
sfdx auth:web:login -d -a DevHubStep-2: At this point, log in using the credentials of the Dev Hub enabled ORG.
Step-3: Then, Salesforce CLI will ask for some access. In this case, click “Allow“.
4. Install the Salesforce Extensions for Visual Studio Code
Step-1: Download and install the Visual Studio Code on your computer system. If you have already installed it, you don’t need to install it again.
Step-2: Then, launch Visual Studio Code and click the “Extensions” icon from the left toolbar.
Step-3: Now, search for “Salesforce Extension Pack” and then click the “Install” button.
5. Create a Salesforce DX project
Step-1: First, create a new folder where you want to store your project files. Open Visual Studio Code and navigate to File > Open Folder and select the folder you just created.
Step-2: Then, In the Visual Studio Code terminal, run the following code. Replace <project name> with the name of your project.
sfdx force:project:create -n <project name>6. Create a Scratch Org
Step-1: In the Visual Studio code terminal, run the following command:
sfdx force:org:create -f config/project-scratch-def.json -a <scratch org alias> --setdefaultusernameStep-2: Then, run the following command to push your project files in the Scratch org:
sfdx force:source:push -u <scratch org alias>Step-3: Finally, run the following command in the terminal to open your Scratch org. This will open your scratch org in your default web browser.
sfdx force:org:open -u <scratch org alias>At this point, your Salesforce DX environment has been set up and you have created a scratch org.
Please contact us at manish@bay20.com or call us at +91-8800519180 for any support related to Salesforce. You can also visit the Salesforce development page to check the services we offer.