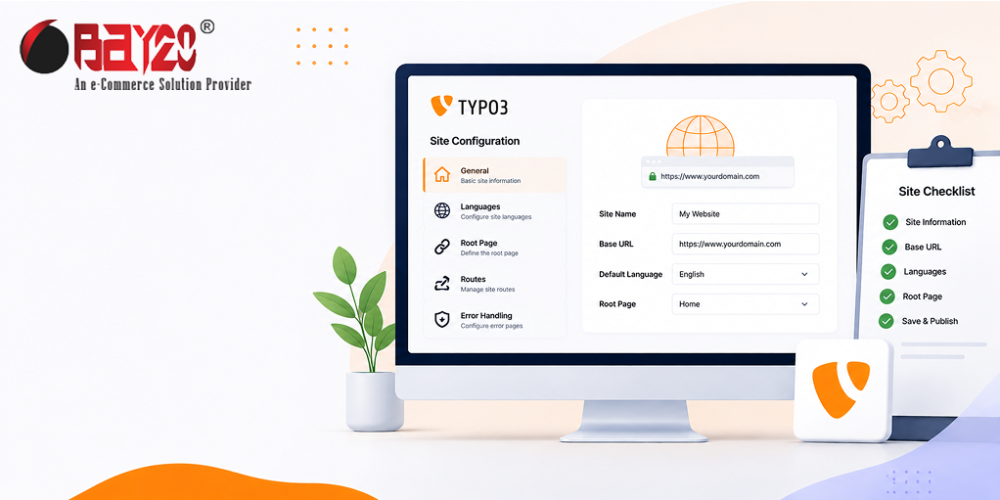
Setting up a site is one of the first things you should do after installing TYPO3. Without a site configuration, TYPO3 cannot correctly display your website or generate page URLs.
The good news is that creating a site configuration is simple. In this guide, you will learn how to configure a site in TYPO3 step by step.
What Is Site Configuration?
A site configuration tells TYPO3 how your website should work. It contains the basic settings that TYPO3 needs to display your website correctly.
- Which page is the root page of your site
- What the base URL of your site is
- Which languages your site supports
- How errors like a missing page should be handled
TYPO3 uses this information to display pages correctly and create friendly URLs.
Step 1: Log In to the TYPO3 Backend
First things first, log in to your TYPO3 backend as an admin. You need admin rights to create or edit site configurations, so make sure you have the right access before starting.
Step 2: Open the Sites Module
Once you are logged in, look for the module called Sites in the left-side menu. It is usually found under the Admin Tools section. Click on it, and you will see a list of any existing site configurations, if there are any already set up.
Step 3: Create a New Site Configuration
If you don’t have a site configuration yet, you will see an option to add a new one. Click on that button. This opens a form where you will fill in the basic details of your site.
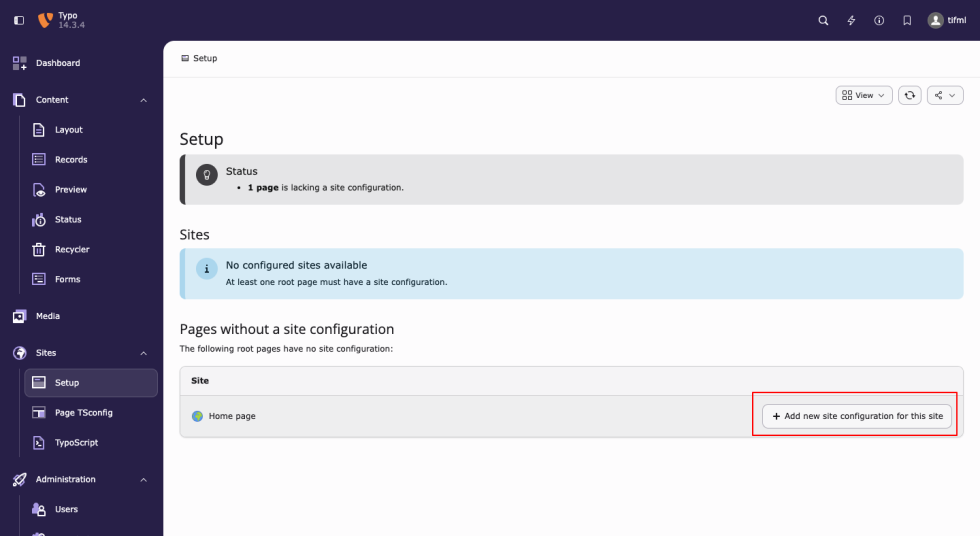
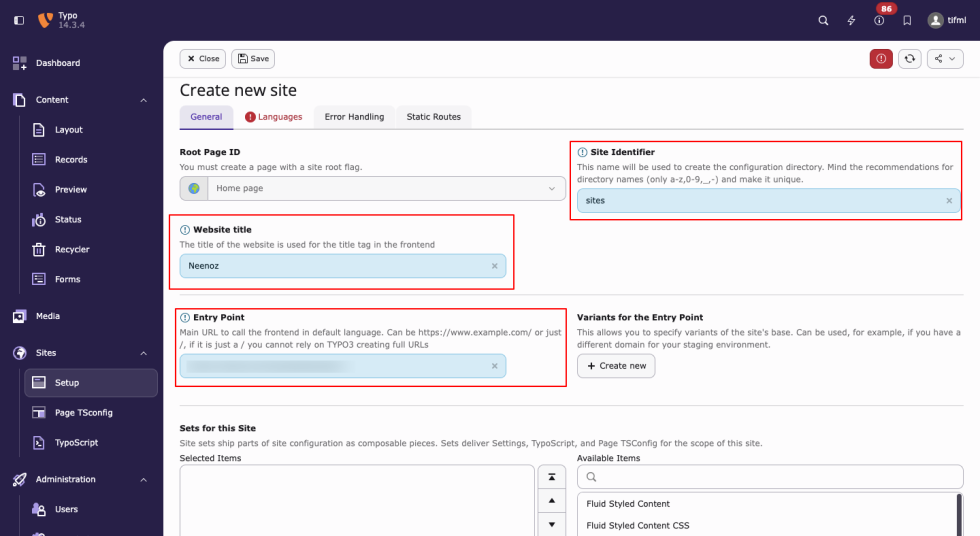
Here is what you will typically need to add:
Root Page became Root Page ID: clarified that you need a page with a site root flag already created, picked via dropdown.
Site Identifier: This is just an internal name for your site configuration. Keep it simple and easy to remember. It won’t be shown to visitors, but it helps you and other editors know which configuration belongs to which site.
Website title: This is the title of the website, and TYPO3 uses it for the title tag in the frontend
Entry Point: This is the base URL of your website that is linked to the selected root page. TYPO3 uses it to generate page URLs correctly. For example: https://www.example.com
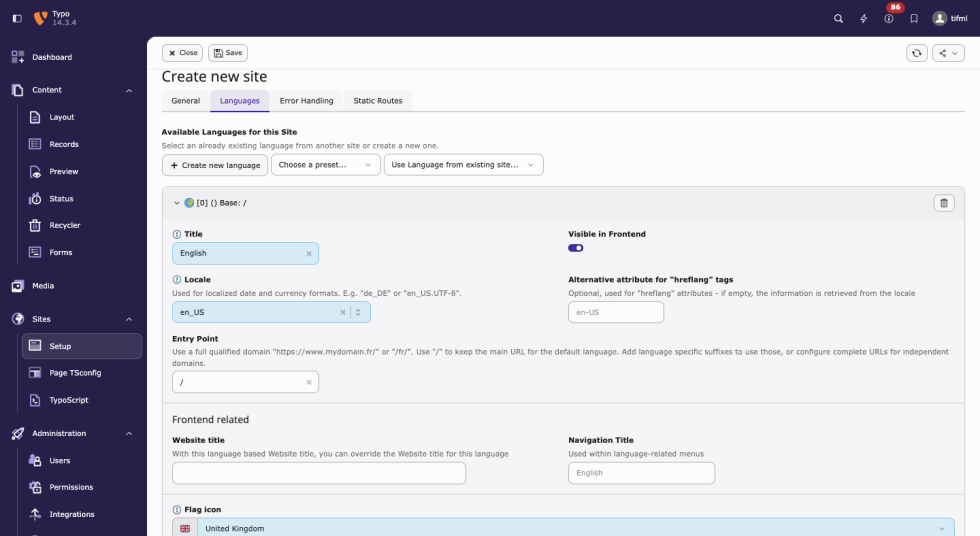
Step 5: Add Languages if Needed
If your website will be available in more than one language, this is where you set that up. You can add each language your site supports, along with its own base URL if needed, such as /en/ for English or /de/ for German.
For each language, you can also choose things like the flag icon shown in the backend and whether that language is enabled by default. If your site is only in one language, you can skip this step for now and add more languages later if needed.
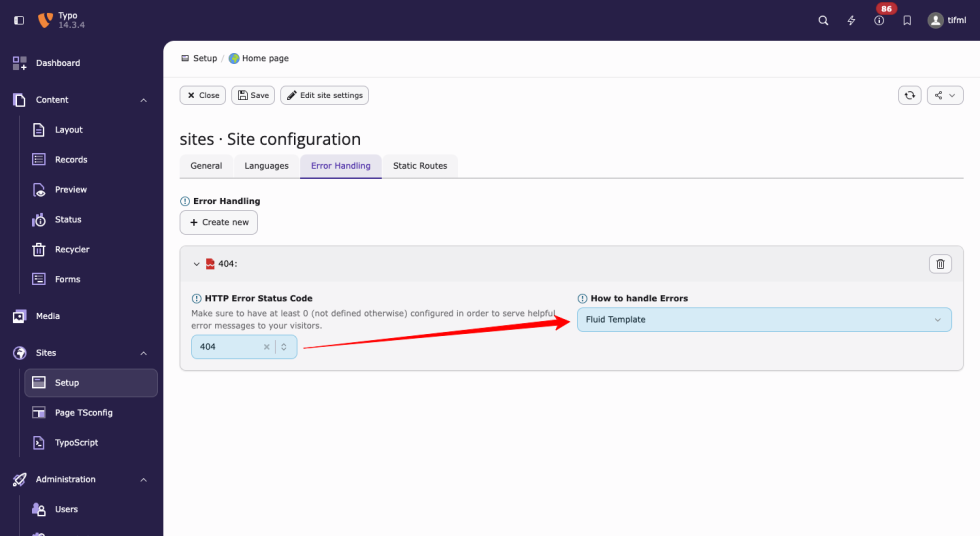
Step 6: Configure Error Handling
Nobody likes running into a broken link, but it happens. TYPO3 lets you decide what should happen when a visitor lands on a page that doesn’t exist. You can set up a custom 404 page here instead of showing a plain error message. This small step can make a big difference in how professional your site feels to visitors.
Step 7: Save Your Configuration
Once you have filled in the details, save your configuration. TYPO3 will create a file behind the scenes to store these settings. You don’t need to touch this file directly, but it is good to know it exists in case you ever need to check it or move your setup to another server
Step 8: Preview Your Website
To preview your website, select the homepage from the page tree, right-click it, choose Show, and your website will open in a new browser tab.
If everything is configured correctly, the page will load without any errors.
Please contact us at wargis@bay20.com/manish@bay20.com or call us at +91-9582784309 or +91-8800519180 for any support related to Typo3. You can also visit our website to check the services we offer.