If you are new to TYPO3, creating your first page is one of the first things you will learn. The process is simple once you understand where everything is. In this guide, I will show you how to create a page and add content step by step.
By the end of this blog, you will have a new page with text, images, or other content that you can view on your website.
Requirement
Make sure:
- TYPO3 is installed and running.
- You can log in to the TYPO3 backend.
- You have permission to create pages and edit content.
Step 1: Log In to the TYPO3 Backend
Open your TYPO3 login page and enter your username and password.
After logging in, you will see the TYPO3 dashboard.
Step 2: Create a New Page
To create a new page in TYPO3:
- Go to Content → Layout from the left sidebar.
- In the page tree, select the parent page where you want to create a new page.
- Click the + Page button above the page tree.
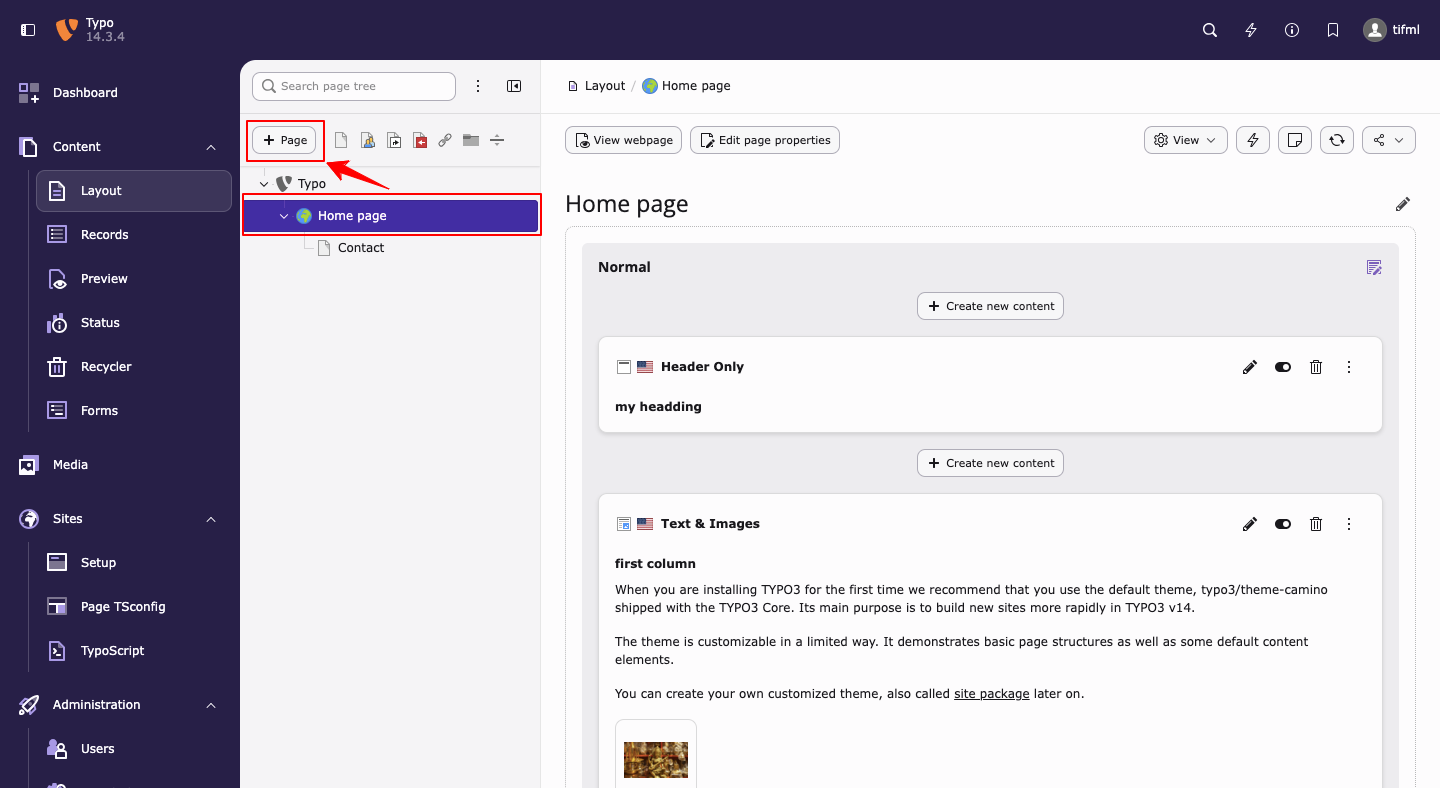
- A new page will be created under the selected parent page.
- Enter a Page Title, make sure the Enabled option is selected, and then click Save.
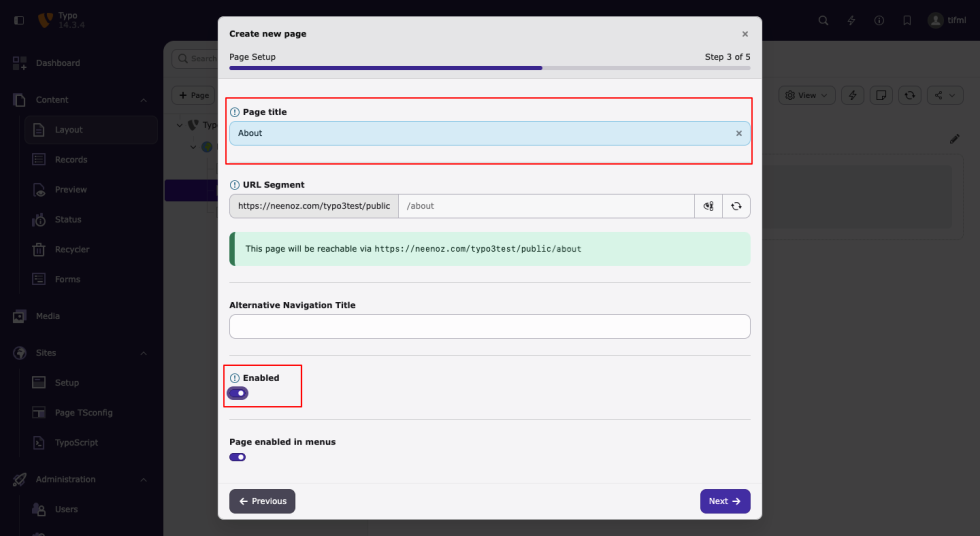
After saving, the new page will appear in the page tree, ready for you to add content.
Note: You can also create a page by dragging the New Page icon (the blank page icon) next to the + Page button and dropping it below or inside the desired parent page in the page tree.
Step 3: Open the New Page
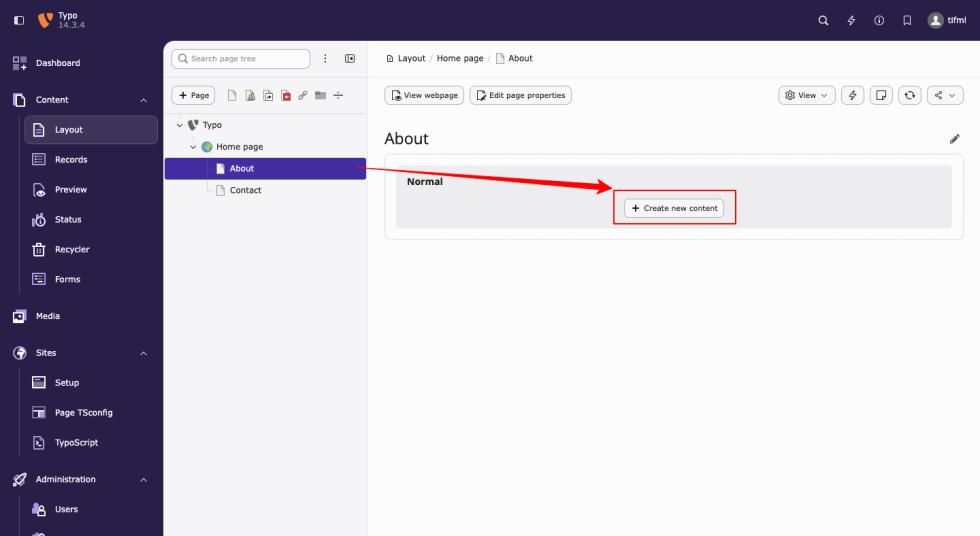
Click the page you just created in the page tree.
When the page opens, you will see an empty content area with a Create new content button. Since the page is new, it does not contain any content yet.
Click Create new content to start adding content to your page.
Step 4: Choose a Content Element
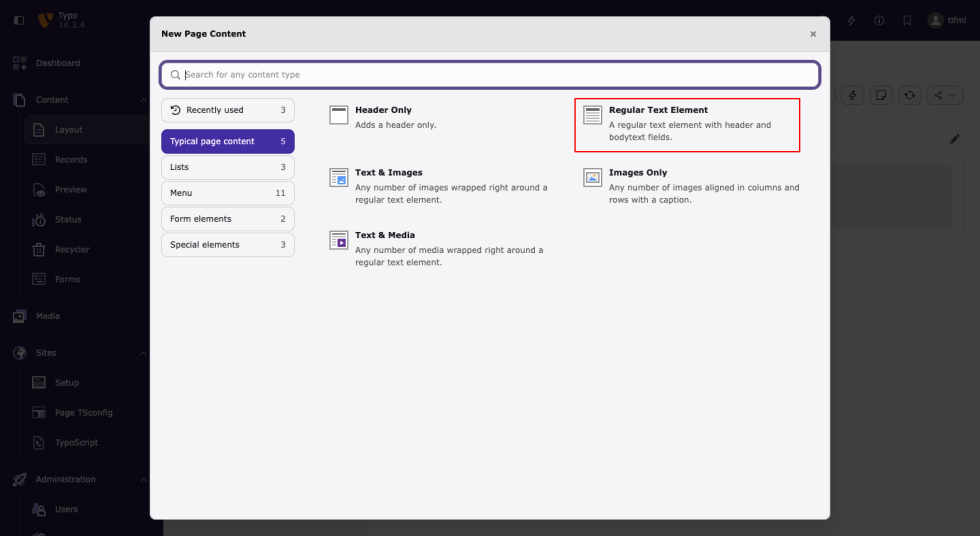
After clicking Create new content, TYPO3 will open the New Page Content window.
Under the Typical page content section, you will see several content types, such as:
- Header Only
- Regular Text Element
- Text & Images
- Images Only
- Text & Media
For this blog, click Regular Text Element. This option lets you add a heading and body text to your page.
Step 5: Enter Your Content
Fill in the required fields based on your requirements.
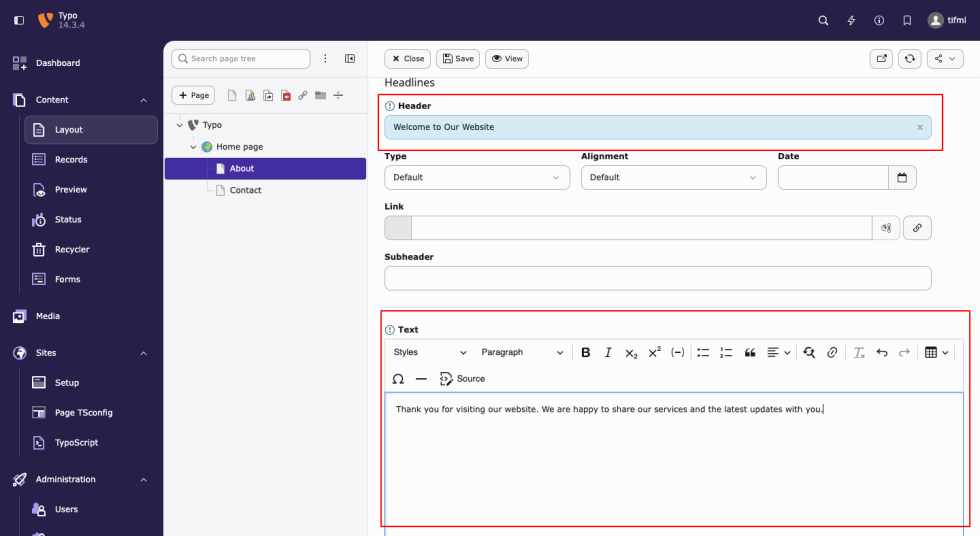
You can also use the editor to:
- Format text as bold or italic
- Add headings
- Create lists
- Insert links
- Source code
Step 6: Save Your Changes
After adding your content, click Save.
Your changes will be stored, and the content will appear on the page.
Step 7: Preview the Page
To see your page on the frontend:
- Select the page from the page tree.
- Right-click the page to open the context menu.
- Click Show.
- Your page will open in a new browser tab, where you can check how it looks.
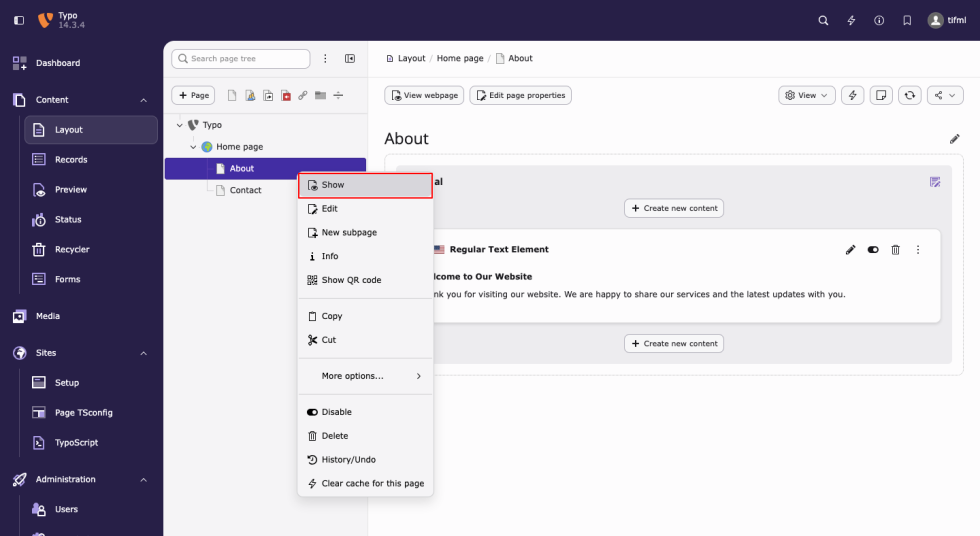
If everything is set up correctly, you will see the content you added displayed on the page.
Please contact us at wargis@bay20.com/manish@bay20.com or call us at +91-9582784309 or +91-8800519180 for any support related to Typo3. You can also visit our website to check the services we offer.