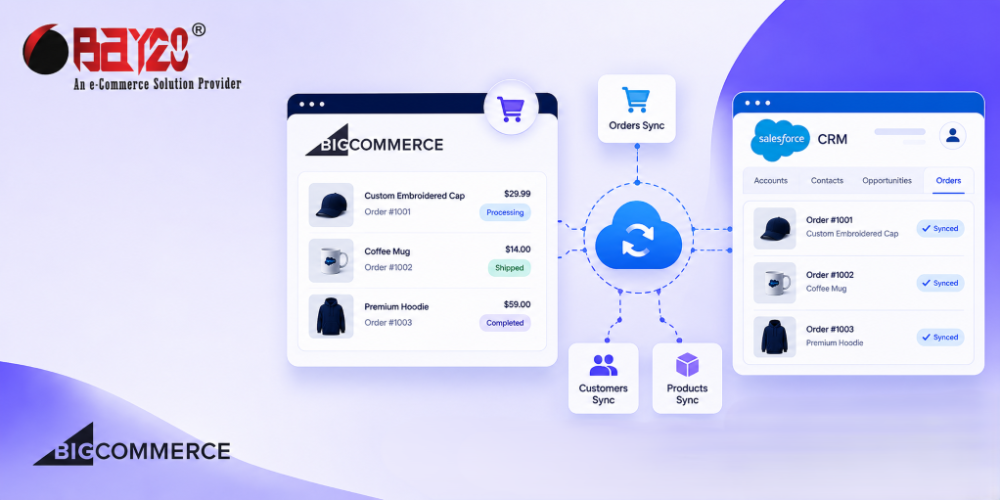
If you have a store built on BigCommerce and a sales team running on Salesforce, there’s a good chance the two don’t talk to each other. Orders happen on the storefront, and nobody on the CRM side sees them without someone manually copying data over. That gap causes missed follow-ups, messy reporting, and a sales team that’s always one step behind what customers are actually doing.
This blog explains how to actually build that connection, end to end, so a new order in BigCommerce shows up in Salesforce automatically, with real data your team can act on.
What Actually Happens Here
Before writing any code, it helps to draw out the flow in plain terms:
- A customer places an order on BigCommerce.
- BigCommerce fires a webhook telling your middleware “an order just happened.”
- Your middleware fetches the full order details from BigCommerce’s API.
- It transforms that data into a shape Salesforce understands.
- It pushes that data into Salesforce using the Salesforce REST API.
That’s it at a high level. Everything below is just filling in these five steps properly.
Step 1: Set Up an API Account in BigCommerce
Before your middleware can pull order data, you need API access set up on the BigCommerce side. Here’s what that involves:
- Create an API account. In your BigCommerce control panel, go to Settings, then API Accounts, and create a new API account for this integration.
- Choose the right scopes. At minimum, give it read access to Orders. If you also want customer details (name, email, billing info), add read access to Customers too.
- Save your credentials. Creating the account gives you three things: a client ID, a client secret, and an access token. Store these somewhere safe, like environment variables, not directly in your code.
- Use the access token for API calls. This token is what you’ll pass in the
X-Auth-Tokenheader on every request your middleware makes to BigCommerce.
That’s really it on this side. BigCommerce’s API accounts are simpler to set up than Salesforce’s, since there’s no separate OAuth flow to configure. The token you generate is ready to use right away.
Step 2: Set Up Authentication in Salesforce
This is where most integrations go wrong if you rush it. For a server-to-server integration like this, don’t use username-password login flows. Use the OAuth 2.0 Client Credentials flow, tied to an External Client App in Salesforce. Salesforce has been moving away from the older Connected App setup for this kind of server-to-server auth, so it’s worth building on the current approach rather than the one that’s being phased out. To set this up:
- In Salesforce Setup, create a new External Client App.
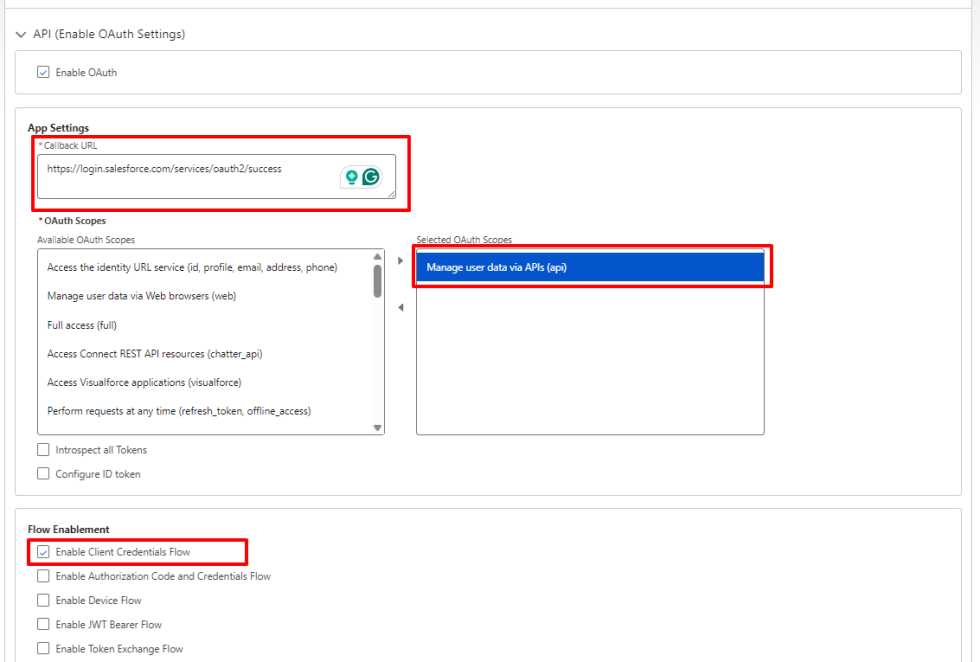
- Enable OAuth settings and select the Manage user data via APIs (api) scope for your integration.
- Set the callback URL. This depends on which org you’re setting up:
- Production / Developer Org:
https://login.salesforce.com/services/oauth2/success - Sandbox Org:
https://test.salesforce.com/services/oauth2/success
- Production / Developer Org:
- Under the Flow enablement, enable the Client Credentials flow and save it.
- Now, under the Policies tab, enable the Client Credentials Flow and select a Run as user(the user that will access the API).
- Then, from the Settings tab, generate the consumer key and secret. These act like your client ID and client secret for Salesforce.
In your middleware, you will need the client ID and client secret to get the access_token. You will be using this access_token for the Salesforce REST API.
async function getSalesforceToken() {
  const response = await fetch(
    'https://your-instance.salesforce.com/services/oauth2/token',
    {
      method: 'POST',
      headers: { 'Content-Type': 'application/x-www-form-urlencoded' },
      body: new URLSearchParams({
        grant_type: 'client_credentials',
        client_id: process.env.SF_CLIENT_ID,
        client_secret: process.env.SF_CLIENT_SECRET,
      }),
    }
  );

  const data = await response.json();
  return data.access_token;
}
One thing worth knowing early: if you ever see an INVALID_SESSION_ID error on your API calls, it almost always traces back to either an expired token, a scope mismatch on the External Client App, or an IP restriction blocking your server. Check those three things in that order before assuming anything else is wrong.
Step 3: Set Up a Webhook in BigCommerce
Instead of polling BigCommerce every few minutes asking “any new orders yet?”, let BigCommerce tell you the moment something happens. That’s what webhooks are for. This step happens entirely on the BigCommerce side, you’re just telling BigCommerce where to send a notification.
Register a webhook for the store/order/created event, pointing at an endpoint on your middleware:
async function registerWebhook() {
  await fetch('https://api.bigcommerce.com/stores/{store_hash}/v3/hooks', {
    method: 'POST',
    headers: {
      'X-Auth-Token': process.env.BC_ACCESS_TOKEN,
      'Content-Type': 'application/json',
    },
    body: JSON.stringify({
      scope: 'store/order/created',
      destination: 'https://your-middleware.com/webhooks/bigcommerce/order',
      is_active: true,
    }),
  });
}
BigCommerce will now hit that URL every time a new order comes in. The webhook payload itself is lightweight, mostly just an order ID, so your endpoint’s job is to catch that ID and go fetch the full order.
Step 4: Pull the Full Order Details from BigCommerce
The webhook tells you an order exists. It doesn’t hand you all the details. Still on the BigCommerce side, you need a follow-up call to get the actual order data:
async function getOrderDetails(orderId) {
  const response = await fetch(
    `https://api.bigcommerce.com/stores/{store_hash}/v2/orders/${orderId}`,
    {
      headers: {
        'X-Auth-Token': process.env.BC_ACCESS_TOKEN,
        Accept: 'application/json',
      },
    }
  );
  return response.json();
}

async function getOrderLineItems(orderId) {
  const response = await fetch(
    `https://api.bigcommerce.com/stores/{store_hash}/v2/orders/${orderId}/products`,
    {
      headers: {
        'X-Auth-Token': process.env.BC_ACCESS_TOKEN,
        Accept: 'application/json',
      },
    }
  );
  return response.json();
}
You’ll typically need both calls: one for the order header (customer, totals, status) and one for the line items (what was actually bought).
Step 5: Get Salesforce Ready, Then Map the Data
This is the part that’s more of a business decision than a technical one, and it’s worth thinking through before you write any code. It also involves some setup work inside Salesforce itself, not just in your middleware.
Salesforce Side
Make sure every product you sell on BigCommerce has a matching Product2 record and a PricebookEntry in Salesforce. Also make sure you have a way to look up the right Account for each customer, usually by matching on email.
Middleware (Mapping the Data)
A clean approach is mapping each BigCommerce order to Salesforce’s standard Order object, with each purchased product becoming an OrderItem. This keeps things aligned with how Salesforce natively thinks about orders, rather than repurposing a pipeline object for something that isn’t really a sales opportunity anymore, it’s already a completed transaction.
One thing to plan for: a Salesforce Order requires an Account and a Pricebook to be attached before it can be activated. So your middleware needs a way to resolve the right Account (usually by matching the customer’s email against an existing Account or Contact) and a Pricebook to use for pricing.
function mapOrderToSalesforceOrder(order, accountId, pricebookId) {
  return {
    AccountId: accountId,
    Pricebook2Id: pricebookId,
    Status: 'Draft',
    EffectiveDate: order.date_created,
    Description: `Synced from BigCommerce order #${order.id}`,
  };
}

function mapLineItems(lineItems, salesforceOrderId, pricebookEntryMap) {
  return lineItems.map((item) => ({
    OrderId: salesforceOrderId,
    PricebookEntryId: pricebookEntryMap[item.sku],
    Quantity: item.quantity,
    UnitPrice: parseFloat(item.price_inc_tax),
  }));
}
The pricebookEntryMap is worth calling out. Salesforce OrderItems don’t take a free-text product name and price the way Opportunity Line Items can. They need a PricebookEntryId, which means every product you sell on BigCommerce needs a matching Product2 and PricebookEntry already set up in Salesforce. If your catalog changes often, it’s worth building a small sync job that keeps Salesforce products and pricebook entries up to date with BigCommerce, so this mapping step doesn’t fail on new SKUs.
Step 6: Push the Data into Salesforce
With the token from Step 2 and the mapped data from Step 5, the actual push happens on the Salesforce side, through a straightforward REST call:
async function createSalesforceOrder(token, orderData) {
  const response = await fetch(
    'https://your-instance.salesforce.com/services/data/v60.0/sobjects/Order',
    {
      method: 'POST',
      headers: {
        Authorization: `Bearer ${token}`,
        'Content-Type': 'application/json',
      },
      body: JSON.stringify(orderData),
    }
  );
  return response.json();
}
Once the Order is created, you get back its Salesforce ID, which you then use to create each OrderItem, linking them back to that record. Orders are created in Draft status by default, so after the line items are attached, you’ll typically want to update the Order’s status (for example, to Activated) so it behaves like a finalized record rather than sitting in draft.
Put It All Together
The full flow, wired up, looks like this:
app.post('/webhooks/bigcommerce/order', async (req, res) => {
  res.status(200).send('OK'); // acknowledge fast, process after

  const orderId = req.body.data.id;
  const order = await getOrderDetails(orderId);
  const lineItems = await getOrderLineItems(orderId);

  const token = await getSalesforceToken();
  const accountId = await resolveAccount(token, order.billing_address.email);
  const pricebookId = process.env.SF_DEFAULT_PRICEBOOK_ID;

  const orderData = mapOrderToSalesforceOrder(order, accountId, pricebookId);
  const salesforceOrder = await createSalesforceOrder(token, orderData);

  const pricebookEntryMap = await getPricebookEntryMap(token, pricebookId);
  const lineItemData = mapLineItems(lineItems, salesforceOrder.id, pricebookEntryMap);
  for (const item of lineItemData) {
    await createOrderItem(token, item);
  }

  await activateOrder(token, salesforceOrder.id);
});
Notice the response is sent back immediately, before any of the actual processing happens. Webhook providers, BigCommerce included, expect a fast response and may retry or mark the webhook as failed if you take too long. Do the real work after you’ve acknowledged receipt.
A Few Practical Tips
Log everything, at least at first. When an order doesn’t show up in Salesforce, you want to know exactly which step failed: the webhook never fired, the BigCommerce fetch failed, the token expired, or the Salesforce call itself was rejected. Good logs turn a confusing bug hunt into a five-minute fix.
Handle retries gracefully. Webhooks can occasionally fire more than once for the same event. Before creating a new Order, check whether one already exists for that order ID, using an external ID field on the Order to track it.
Use Postman while building. Before wiring anything into live code, test each API call manually first: get an order from BigCommerce, get a token from Salesforce, create a test Order. This makes it much easier to catch a bad scope or a malformed payload before it’s buried inside your integration code.
Watch your rate limits. Both platforms have API rate limits. If you’re syncing a high volume of orders, batch your Salesforce writes using the Composite API instead of firing one request per record.
Conclusion
Connecting BigCommerce and Salesforce isn’t complicated once you break it into these steps: authenticate with BigCommerce, authenticate with Salesforce, catch the webhook, fetch the full order, map the data, and push it over. The trickiest part usually isn’t the code, it’s deciding how your order data should map onto Salesforce’s objects in a way that actually fits how your sales team works. Get the basic flow solid first, then layer on retry handling, logging, and rate-limit-friendly batching once you know it’s syncing correctly.
Please contact us at wargis@bay20.com/manish@bay20.com or call us at +91-9582784309 or +91-8800519180 for any support related to Bigcommerce. You can also visit our website to check the services we offer.